I had a really productive discussion with my extended development teammates last week, I was able to give a high level overview of the work I am doing with dasBlog in my spare time. It was a lot of fun, and my teammates had genuine interest in the work but a couple of colleagues expressed concern about the gap presented by GitHub.
In the past when our dev teams moved between code repositories (VSS to CVS to SVN to TFS) there was a gradual shift in branching methodology, however, Git seemed to immediately transform the nomenclature and the ideas behind it. I am slowly acclimating myself to Git and so I wanted to share how a developer with a long history with Visual Studio developer can get quickly get involved with projects hosted on GitHub.
Quick confession, I have not used Git command line for this project. Not once! I will need to remedy this but for now I want to highlight how you can get around with almost no Git command line experience. To follow my easy GUI based pattern you will need to download and install the GitHub for desktop app and sign in with your GitHub credentials.
General GitHub workflow
With a project like mine, where I am taking updates from literally anyone and everyone, the following steps represents the workflow for the potential contributor:
- Fork the repo and clone it to your local machine
- Create a local branch for the contributions you plan to make.
- Push your branch to the remote repository
- Create a pull request for your changes so that the upstream repo owner can review it
- Sync your fork with the latest changes
Lets break down each of these steps in more detail.
Fork the repo
A fork is a complete copy of a repository that you own, it includes all files and commits from the original repo. The new fork is a veritable clone of the original repository, but completely disconnected. New files, folders, and branches that you created are not automatically shared between the original repository unless you explicitly send a request (see pull request below).
After you have signed up with GitHub you can create a fork by simply clicking the fork button on the target repository. Should look like the following image.
At this point you can open up the GitHub desktop app and click on File->Clone repository and download a copy of your fork (which the app will see) anywhere on your local machine.
For the scenario where you plan to make frequent contributions back to the original repo you should avoid making changes directly to your fork and opt instead to create a local branch.
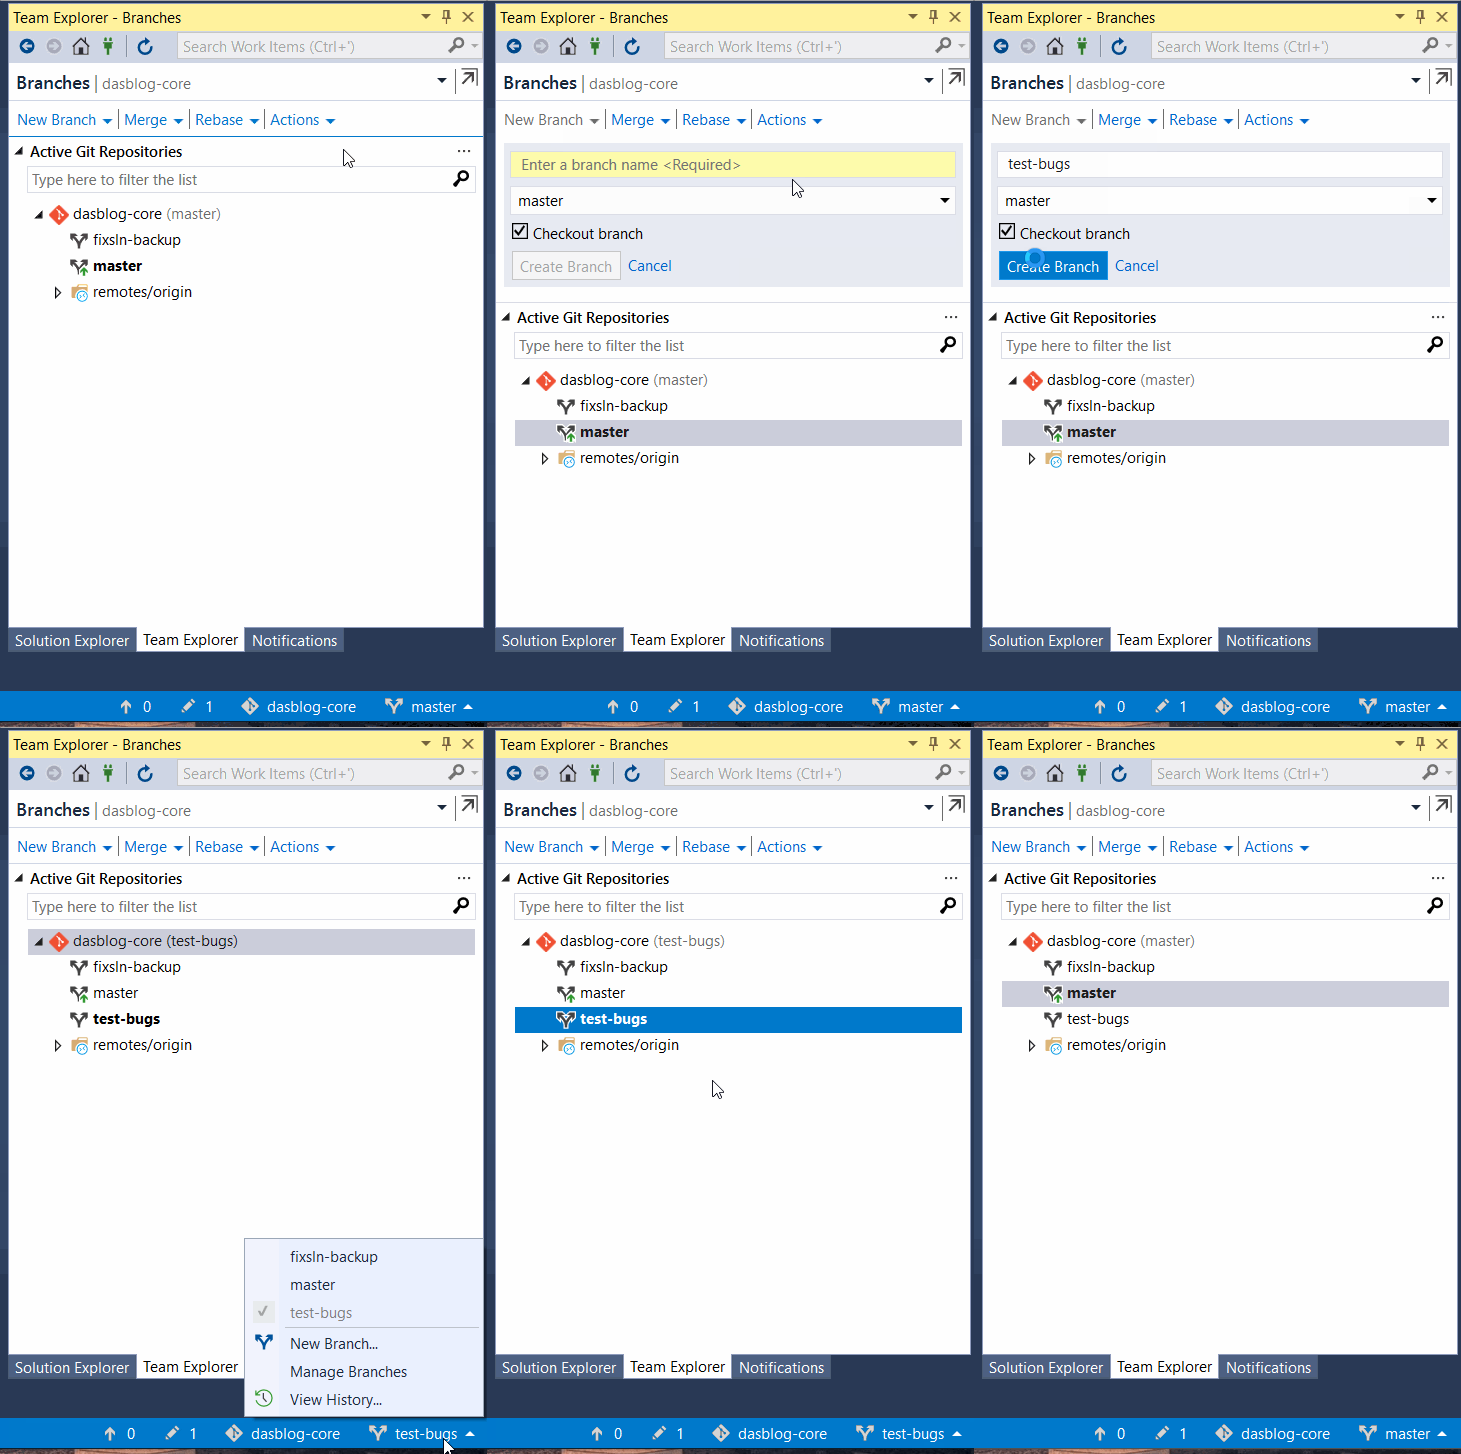
Create a local branch
Think of branches as light weight pointers that keep track of a list changes and commits, in this way branches are cheap and can be created at almost any time you want to hack on a feature or just try out a new idea. You can create a local branch in a split second based on your fork and name it based on a issue you have decided to tackle.
Branches are quick and easy to use, so you can have as many of them as you like, this allows you to quickly switch between them so you can go from working on bugs and then switch to a branch with half-finished enhancement without manually creating local copies of your work. TFS has a similar concept in shelvesets although that process is tied directly to the TFS server.
Push your local branch
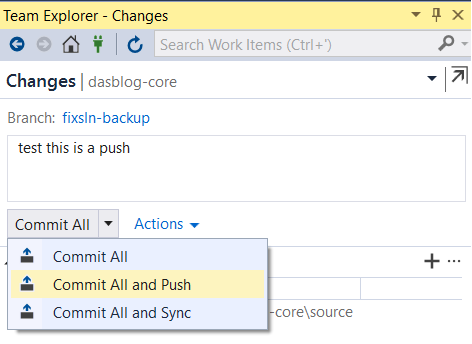
You can share changes from your local branches by using the push command. Pushing your branches to the remote repository, Git takes the commits and adds them to an existing branch on the remote server.
- On the Team Explorer tab click on the Changes button.
- Enter a commit message detailing the change.
- Select the Commit All and Push option.
Create a pull request
Once you have completed a fix and pushed it to the repo you are now in a position to create a new pull request. We use the pull requests to review work and potentially have it committed back to the original repo. This is not guaranteed as the reviewer could elect reject the changes or ask for additional work to be done.
In order to accomplish this step we have to leave the safety of Visual Studio and head back to GitHub.
- Go to your fork and click on the branches link
- Find your recently updated branch click on the New pull request
- Fill out the details of pull request, communicate specifically what issue or enhancement you are resolving and create the pull request
Sync your fork
Synching your fork should be done regularly, this allows the upstream repo to share its latest changes back to your fork. This is especially important because your local branches will all be created from your fork and so assuming that your pull request is accepted this is how you complete the full circle.
- On the Team Explorer tab click on the Sync button.
- Click on the Sync link
Now to be clear the command line is indeed where it is at but not being comfortable with all the commands is no excuse to not get started.


Comments are closed.